Design Process
Whether I work with a startup for years or with an individual for weeks, here is an outline of my general design process that helps me take up any sort of problem, make sense of it, and come up with solutions.
Discover
I begin by understanding the following:
- Users' goals: Who the users are and what they want to achieve with the product.
- Business goals: what you want to achieve with the product
- Features to be implemented and how they are relevant to the users' goals
- Competitors: Their strengths and weaknesses. I try out the competing products to understand how they've solved the problems, and to see how to make your product unique.
- Constraints: Technology, team strength, deadlines, etc.
I go through any information that could help me understand the users, their requirement and their behavior such as, survey results, customer feedback, app/site analytics reports, user testing videos, etc. I try out the product built so far.
Define
Probably you've already defined the feature set and even started building the MVP, yet, I'll independently assess how best they suit the user experience and help users achieve their goals. My input might help you redefine or refine the features.
I identify and prioritize the use cases, the major tasks users do with the product, so that I can design it to let users complete the highest priority tasks quickly. For websites, I create a rough site map that gives a bird’s eye view of the organization of content.
Low-fidelity prototype
In this phase I come up with the best way to organize information across the app and within each screen, how to navigate between screens and how the app would respond to user actions. I map out the information architecture of the entire product, create user flow diagrams, and sketch the UI layouts.
I do the above only using paper and pen, and the output is a disorderly collection of boxes and lines. I usually don't share these with the team, because it's difficult and time-consuming to go through, visualize and understand these abstract box diagrams—people are busy. If required I create these diagrams in a presentable form to share with the team but usually the situation never arises.
So, I switch to Figma, to create wireframes and an interactive prototype of the app, which gives a better idea of the final product and the way it works. It's far more easier and efficient for team members to try out the prototype and get an idea of the shape the app is going to take on various devices. This starts the actual internal discussion on the product. It can be even used to test with users (at least within the team) to get some quick, top-level feedback.
High-fidelity mockups & prototype
I create high-fidelity visual mockups of a few key screens/pages, using appropriate layout, colors, typography, and icons. Once the visual style is agreed upon, I design all the screens that contain unique elements.
As the design/development progresses, I convert all the wireframes into high-fidelity visual mockups, and create a high-fidelity prototype. With all the components in their final visual state in place, most future design iterations can be communicated with high-fidelity prototypes.
Build and iterate
Once we agree on the design, I create a design system/style guide that the developers can use to build the UI. The design system collects all the reusable UI components in their different states (e.g. normal, active and hover states of a button), and specifications of layout, colors, typography, pictograms/icons, animations, etc.
I collaborate with the development team to see that the product is built as designed, by regularly testing the developed UI and pointing out discrepancies. Sometimes, an overlooked edge case might come up when building the UI, or some technical constraint might make a part of the design too time consuming to develop. In those cases, I quickly provide alternatives, so that the development can continue smoothly.
When working with startups, I split my time between designing new features, implementing the current features, and improving the existing features. I adopt whatever workflow you have in place (Trello, Jira, Asana, Slack, etc.).
Brand identity design process
Research
A complete understanding of your product/company for which you require the brand identity is the critical starting point of the design process. I’ll send you a questionnaire to understand about your company, your goals, your target users, how you want to appear to them, what sort of feeling you want to evoke in them, your competitors, etc.
I’ll research your competitors' branding and other branding in your target market to see how we can create a different and emphatical brand identity.
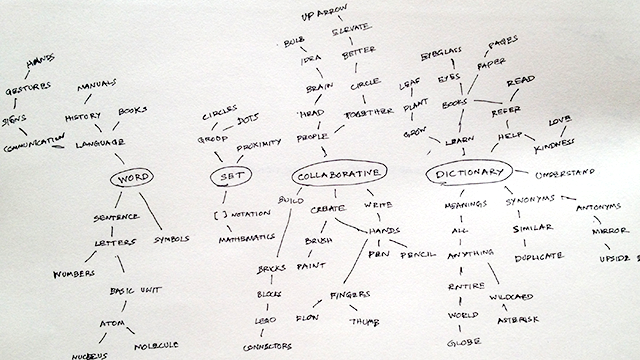
Brainstorming
I’ll create a mind map using your product/company name and words that describe its main characteristics. From there I’ll branch out to associated words and form an 'idea cloud.' From this cloud I’ll look for ideas that could be represented visually and brainstorm more on them.
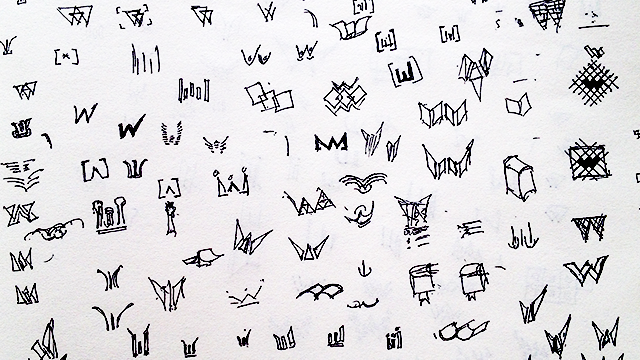
Sketching
After choosing the interesting and stronger ideas from the previous stage I’ll start sketching concepts for the logo/identity I’ll sketch them on paper. Sketching reveals stronger concepts and encourages further exploration.
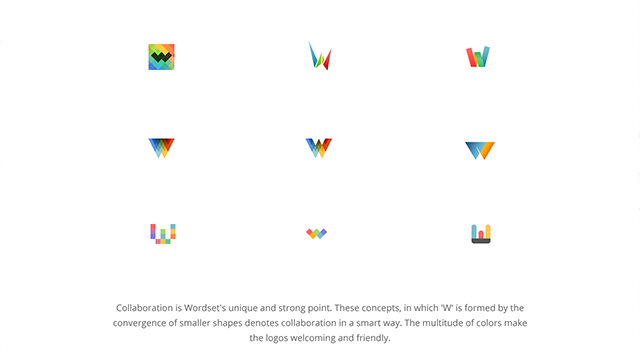
Rendering
I’ll render the stronger concepts of the logo in Photoshop and share it with you. At this stage I usually create the concepts only in black and white or greyscale so that we won’t be distracted by color when selecting the concept.
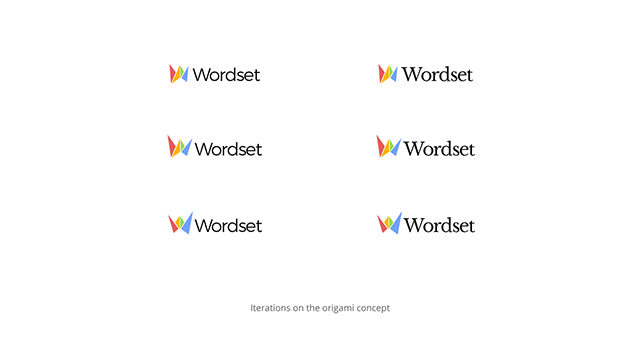
Refining
Once you select a concept I’ll try to come up with more variations on it and present it to you. By this time I’d also introduce color and present some variations on it. Once you select the final design I’ll refine it if required.
Designing collaterals
Once we finalize the brand identity I’ll design the collaterals that you need, such as, business card, letterhead, favicon, etc.